Next step in setting up the backup task is to select where you would like to keep your backups.
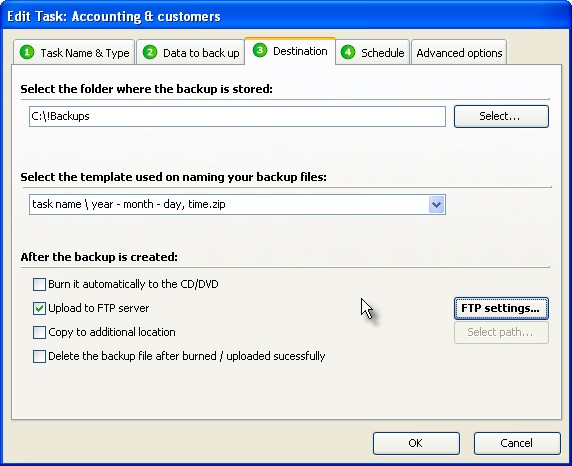
If you would like to change the default location (folder) where the backups are stored, click on the "Select" button and locate the folder you would like to use to your keep backups of this task. This will be the destination folder for your backups. Please note that destination folder should be a folder in your local or network computer, on the hard drive. Destination folder can not be your CD or DVD device. To put your backups to CD and DVD discs you can use other options explained below.
After the destination folder is set, you can select the name template. It is used to give a name to each backup file that is created. Available options are:
| 1. | task name.zip |
| 2. | task name \ year - month - day, time.zip |
| 3. | task name \ year \ month - day, time.zip |
| 4. | task name \ year \ month \ day, time.zip |
| 5. | task name year - month - day, time.zip |
| 6. | taskname-year-month-day-time.zip |
| 7. | year - month - day time.zip |
"Task name" in the template is replaced with real task name when the backup is created. Other values like year, month, day and time are replaced with backup file date and time. When using templates 2, 3, or 4, also appropriate sub folders are created to the destination folder. Template 6 is different in terms that spaces are removed from the backup file name (required to upload backups to some Unix FTP servers).
After the backup is created
Once the backup file is created, you have some additional options available:
| 1. | Burn. If you have CD or DVD burner installed to your computer, and set up in the program options, you can burn the backup to the disc automatically. Just check this option and make sure the disc is in the drive when the backup is created. If the disc is not in the drive, the backup is still created, but it can not be burned. |
| 3. | Upload to FTP. If you have FTP server access, you can upload the backup file to the remote computer. For this, check the FTP uploading option and click on the "FTP settings" button. On the FTP settings dialog, enter the information about your server: |
| • | Host is the address of your remote FTP server. |
| • | Port is the port used by your FTP server (by default, 21) |
| • | User name is the name used to connect you to the server |
| • | Password is the password used to connect you to the server |
| • | Folder is the default folder the program will open once you are logged in. |
| • | Passive mode selection indicates if the servers using the passive mode or not. |
| 3. | Copy to additional location option, if checked can duplicate the backup file and copy it to additional location in your local or network computer. |
| 4. | Delete from the destination folder after burned / uploaded successfully option can be used to delete the backup file once it is burned and / or uploaded successfully. |